This is the simplest possible design for a portable low-cost PC-based CAVE-like display. While it is intended for use with CaveUT, you could use it for any kind of immersive display software using Windows, Linux or MAC OS. Some examples are: VR Juggler, CaveQuake III & CaveQuake II, Chromium & WireGL, Free VR, Open GL.
The methods described here could be used to build a variety of CAVE-like displays. Simple as it is, this design illustrates the important techniques and benefits. I welcome your comments, suggestions and additions! I tried to make this page a standalone document, but it is predicated on the use the CaveUT as the software platform. Please refer to CaveUT for more information.
|
Terminology Requirements Main Parts Projector Mounts Making It Portable |
Parts for Portable Screens How to Assemble Portable Screens Packing It Into Your Airline Luggage Random Ideas Acknowedgements |
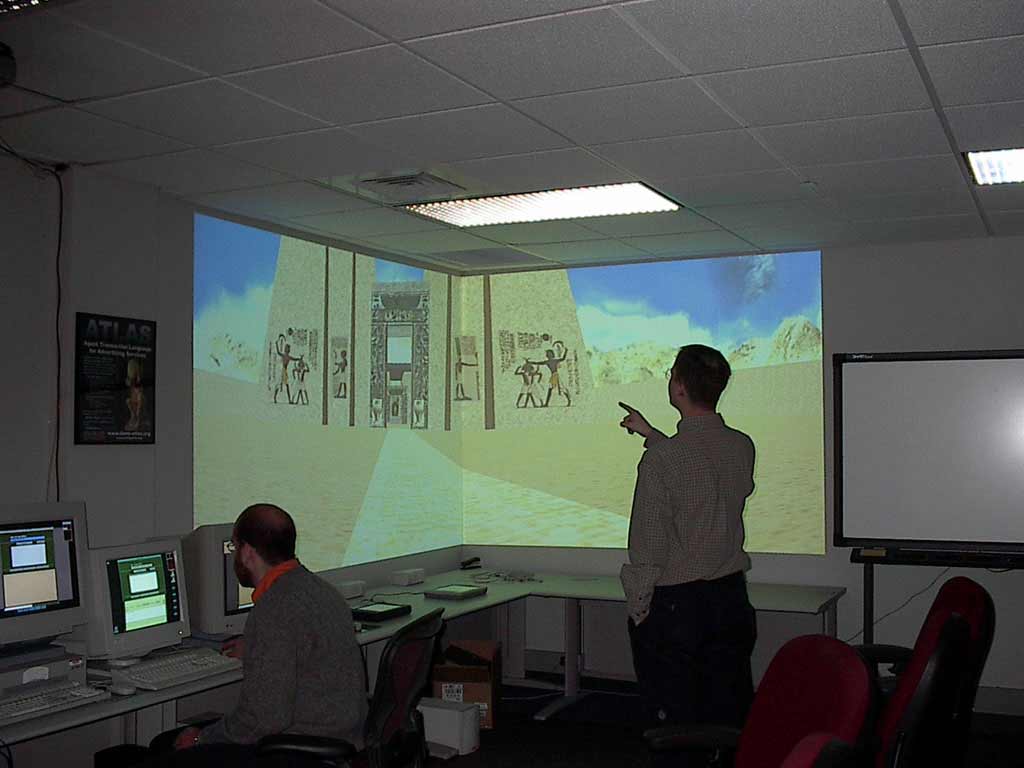
You need a clean, white corner of some room. You will be amazed at how difficult it can be to find. ;-) If the walls are not white you can cover them with everything from paper to screen material. I find that white shower curtains work rather well, but so do very large pieces of white paper. The brighter your projectors are, the more you can get away with. The UT-Cave shown in figure two is projecting onto walls that are 50% gray!

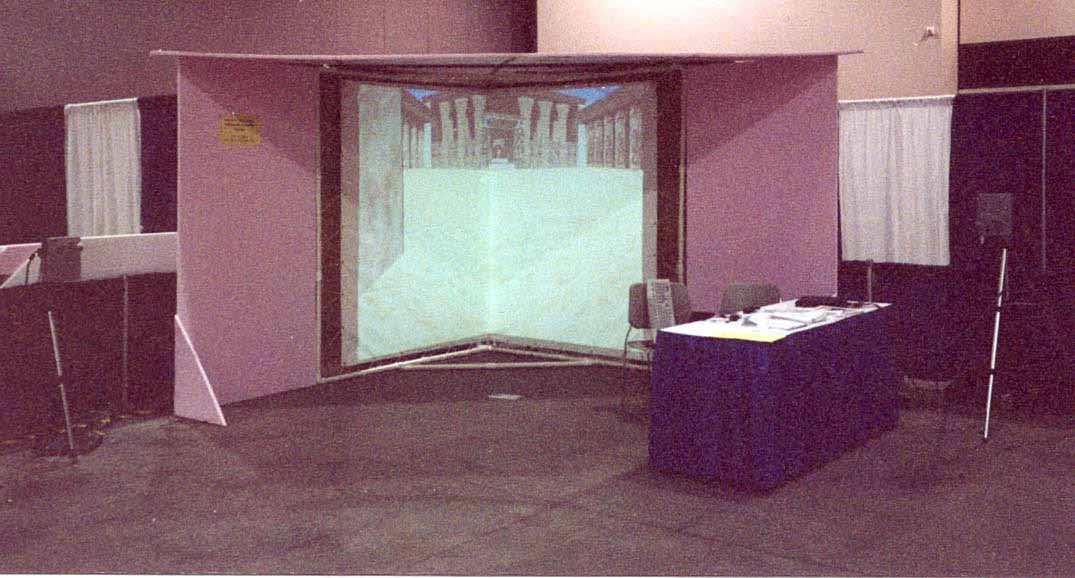
Two digital projectors are each mounted on a wall and pointed into the corner of a room as shown in figure two. Each projector displays on the wall perpendicular to its own. One edge of each projection lies along the corner itself, so the two images abut. If the projectors are bright enough and the wall is both clean and white, no screen material is needed. Otherwise, you can use some covering material like very large sheets of paper, white foam core, white plastic or tyvek.
To begin, start a networked multiplayer game of Unreal Tournament (UT) on his computer. Enter the game as the only player, which
starts a game server on the console machine and also launches a client so you can play the game from the console. Now, go to each of
the PCs connected to a projector and start a client version of UT which enters the game as a spectator. In spectator mode, with certain
options set, the client simply shows the same view that the player on the operator console sees. However, the CaveUT modifications in
each UT client causes the appropriate view rotation and perspective corrections needed for that particular screen. For the example, the
UT-Cave in figure two, shows two client displays. One spectator's view is looking 45-degrees to the left, the other is looking
45-degrees to the right. (See
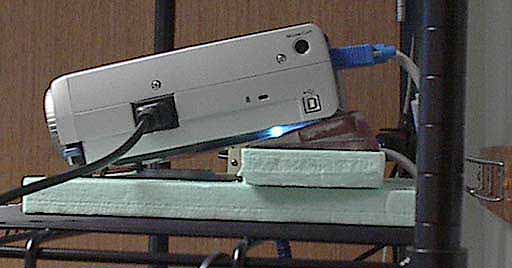
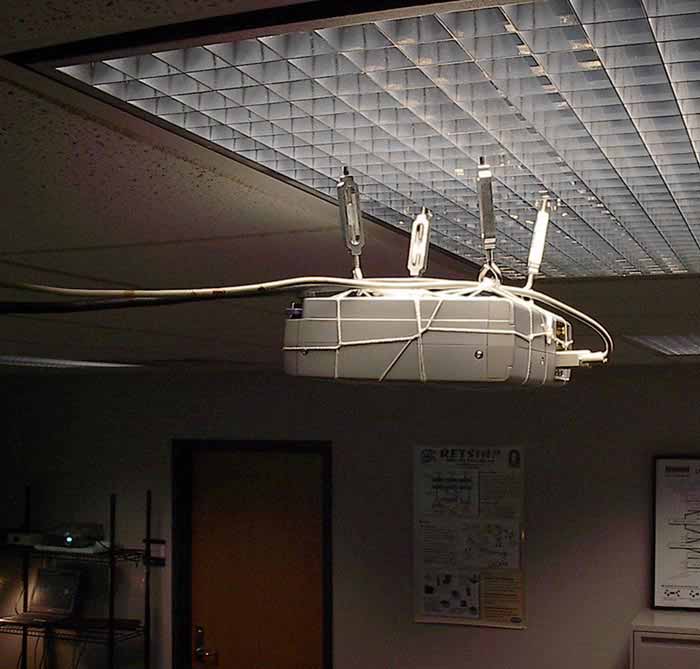
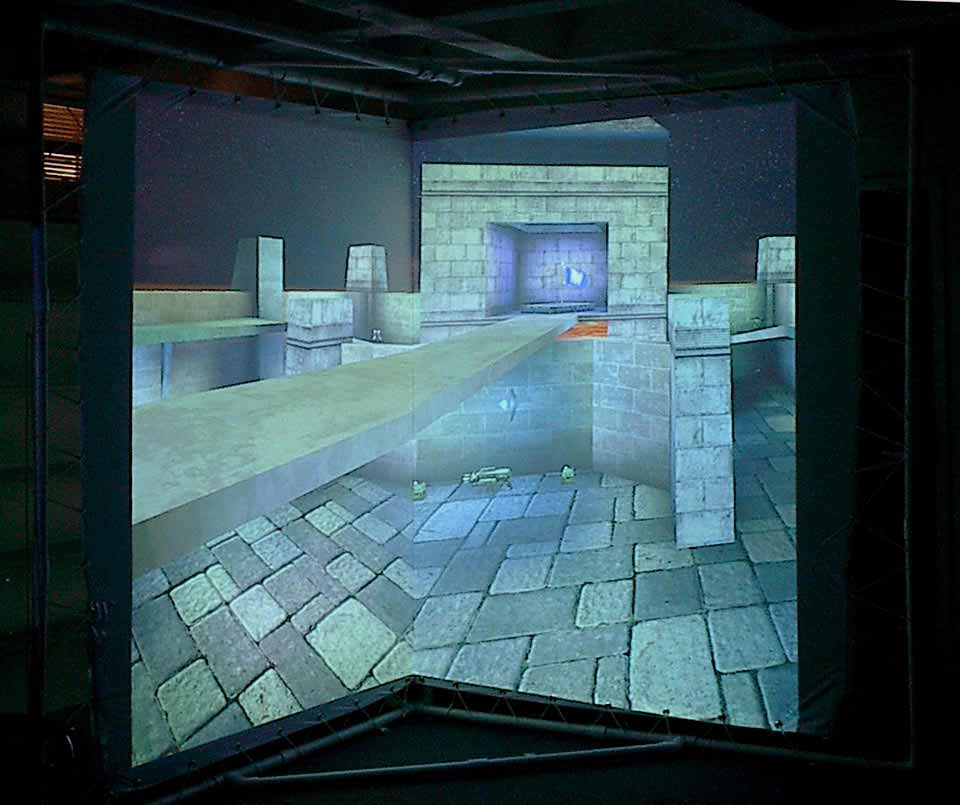
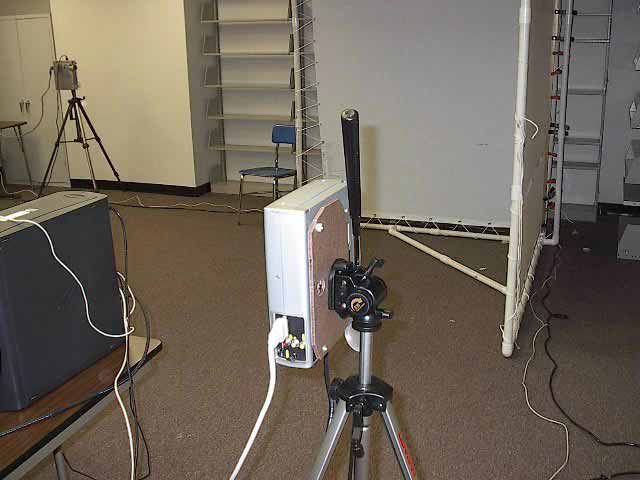
For the demonstration shown in figure two, I put the ideal viewing point at the location shown in figure one, giving a viewer there approximately 100-degrees of horizontal FOV. However, the UT-Cave shown in figure two differs from the diagram slightly, because the projectors are not turned sideways. One was on top of a bookshelf (fig 4) and the other was hanging upside-down from hooks in the ceiling. (fig 3)
The following is an inventory of all the parts I used for the two-walled UT-Cave, excluding the projection surface. In many cases, you can get away with fewer materials, but you should not need more.
The cheap kind. Sometimes called a "Network Switch". Make sure you get one that is physically rugged.
This should be enough for a this UT-Cave setup. Also known as an "RJ45 CAT-5e Patch Cable" or something similar.
Be sure to plug everything into the surge protected for the safety of your equipment, but also make sure its a good brand that is physically light and small. I recommend the "Surge Master (tm) from Belkin. You could even use an Uninterruptible Power Supply (a UPS) if you are uncertain about the quality or stability of your power supply.
They should be fairly strong, to produce the best graphics performance. For this UT-Cave I used two P4 1.1ghz laptops, with lots of RAM and geForce2 cards. I ran them at 1024x768 resolution. The console laptop was much more modest. I think it was a P3 800mhz with 128 RAM, running Windows NT. The console machine only has to be strong enough to provide smooth interaction. For showing off CAD models, these machine are more than enough. If you start showing off lots of human figures, or very complex models, you may notice a falloff in performance. The projector machines can be running Windows or Linux. The server machine can be MAC-OS, Windows or Linux, and it only has to be fast enough to provide smooth interaction. A useful trick is to reduce the resolution and rendering quality to the absolute minimum.
You can use any kind of control device. keyboard, a joystick, or your favorite game peripheral. This will be the input the device the operator is going to use the navigate and interact with the virtual world. I also suggest an extension cord or two for the peripheral, so the operator does not have to always be next to the console. I am using a keyboard, right now, only because I don't time to really investigate a good interface for immersive Unreal Tournament.

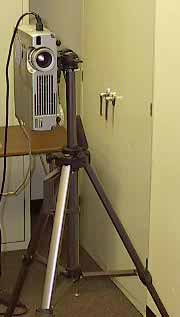
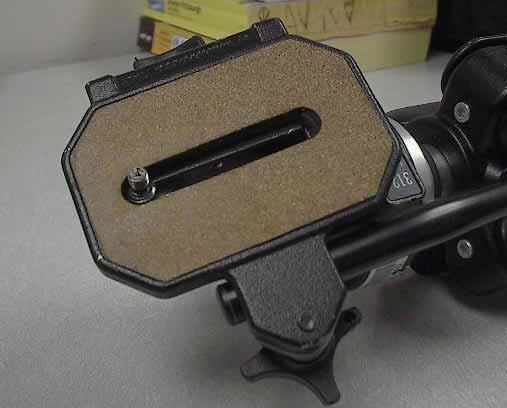
These are the tripods to hold up the projectors. (fig 5 & 6) The ones we used are too cheap and only barely strong enough to do the job. Typically, a good tripod (about $100 and up) has a simple platform (the head) with a slot in it and a single bolt. (fig 7) You attach your camera or projector or whatever onto the bolt, and the tripod both holds up the projector and allows you to angle it in any direction. The stronger your tripod, and the lighter your projector, the better you will be able to make fine-tuned adjustments.
Make sure that after you mount one of your projectors on a tripod, the tripod can rotate the projector a full 90-degrees to the right AND a full 90 degrees to the left. You will need this capability for times when you want to put the projectors sideways, so your projection area can be taller than it is wide.
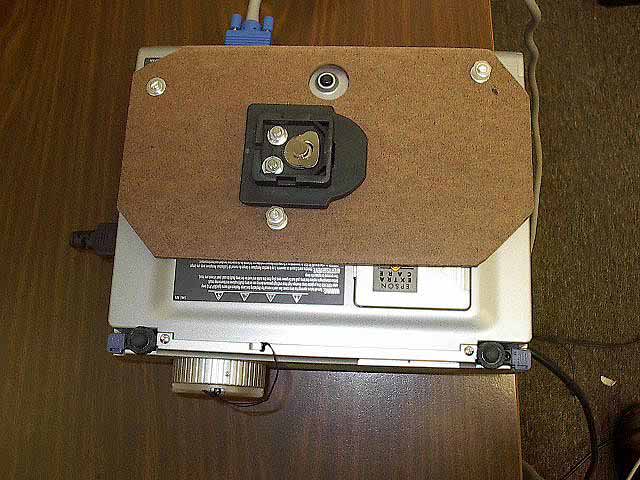 I used two Epson Powerlite LC projectors. Figure eight shows one with it's mounting plate attached. It is important that
you use small projectors like these, for ease of mounting, ease of transport and heat dissipation
I used two Epson Powerlite LC projectors. Figure eight shows one with it's mounting plate attached. It is important that
you use small projectors like these, for ease of mounting, ease of transport and heat dissipation
WARNING! You MUST use the small model projectors, the seven-pounds and under types, if you plan to turn them sideways. The small models have powerful fans built into them which will keep their internals cool at any orientation. Larger models may or may not be the same way. Some larger models will overheat and burn out if they are held sideways and run long enough. Also, just because a projector can be turned upside-down to be ceiling mounted does NOT mean it can be turned sideways. It all depends on how air flows in the projectors.
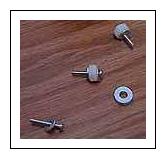
The projectors needs some way to be attached to the tripods. (fig 5 & 6) I used two one-foot square pieces of 1/4" hardboard, some special metric screws and some other very small items. Don't try to buy these in advance--it's better to improvise, starting from the particular projectors you have. Figure eight shows a projector with it's mounting plate attached.
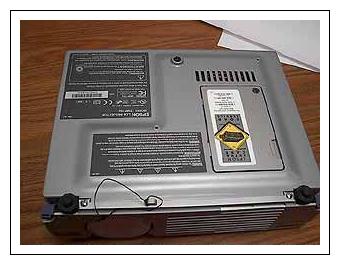
You will have to make a mounting plate for each projector to attach it to the tripod. Most projectors are designed with some way to mount them upside-down from a ceiling. Our projectors have threaded bolt-holes cut directly into the projector case, which is a common feature. (fig 9 & 10) Use these to attach the plate to the projector. (fig 8 & 10) For most projectors, you can buy a mounting bracket, usually for ceiling mounts, but they tend to be outlandishly expensive for such a simple thing. If you have way more money than manpower, and you do buy one, make sure it can be mounted on a tripod.
WARNING! The plastic case of/for the projector is much softer than any metal bolt or screw. The threaded holes in our projectors have no kind of metal lining--they are just cut into the plastic case. This is no problem if you are gentile, but you MUST NOT try to force the bolt in. It is very easy to strip the threads in the bolt-hole, this way.
WARNING! (For Americans, especially) The bolt-holes may have a metric threading, as our projectors do. If the required bolt size is not in the projector's specifications, you will have to go to a good hardware store with the projector and try metric screws until you find one that fits. (Alternatively, you could just read the bolt-size the projector's specifications, but there are a lot of ways this strategy can fail.) The worst thing you can do is force an English system approximation into the hole, because you will strip the bolt-hole's threads.
WARNING! However you mount or place a projector, DO NOT cover up any of its air vents! That will definitely cause it to overheat.
1 Make a plate of some flat material and cut it to match the dimensions of that side of the projector. I recommend either hardboard or plexiglass, but almost anything flat and cut-able will do. If the plate covers up a vent on the projector, then cut an equal-sized hole in the plate to let the air through.
2 Drill a hole in the plate for each bolt-hole. Be sure to carefully measure the bolt-holes' relative locations and mark where you want to drill into the mounting plate. It's very hard to guess right about where to drill, and it's not worth trying.
3 Add something to the mounting plate which will allow it to attach to the tripod with a bolt of some kind. I just bolted the mounting plates that come with the cheap tripods directly onto my mounting plate for the projector. It's not as easy as it looks, though. Don't do this. Get a good tripod, instead.
Probably the best thing to do, if you have the tools, is to make the mounting plate out metal and just weld a steel nut to the middle of it. Then, you can just attach it to the tripod's face-plate with a steel bolt. I recommend steel, because the entire weight of the projector will be resting on just the threads in the nut and the tip of the bolt.
 One Possibility is to put some space between the mounting plate and the projector, by using longer screws and nuts between the projector
and mounting plate. (This has nothing to do with figure eleven.) Then have a single hole in the center of the mounting plate with a
much larger bolt going through it. Orient the bolt so it's head is between the mounting plate and the projector with the threaded end
sticking out. Then you can bolt it to the tripod's faceplate, easily. If you do this, use a very large washer between the bolt's head
and the projector-side of the mounting plate. I recommend a "fender-washer", which looks like a blank coin with a hole in the middle.
You could safely use an ordinary bolt and nut (not steel) for this design.
One Possibility is to put some space between the mounting plate and the projector, by using longer screws and nuts between the projector
and mounting plate. (This has nothing to do with figure eleven.) Then have a single hole in the center of the mounting plate with a
much larger bolt going through it. Orient the bolt so it's head is between the mounting plate and the projector with the threaded end
sticking out. Then you can bolt it to the tripod's faceplate, easily. If you do this, use a very large washer between the bolt's head
and the projector-side of the mounting plate. I recommend a "fender-washer", which looks like a blank coin with a hole in the middle.
You could safely use an ordinary bolt and nut (not steel) for this design.
4 Attach the mounting plate to the projector. Be aware that the bolt-holes are not usually deep. If you cannot find bolts that are the right length, get ones that are a little too long. Then you can use washers and/or nuts as spacers. (fig 8 & 11) The nuts I used are white, because they are made of vinyl, which does not slip easily, but I don't think it really matters.
A Tangent on Keystone Correction: Most commercially available projectors have a lens inside them which introduces a keystone correction. This causes the beam to spread upward as shown in figure twelve. It's done that way, so you can put the projector on your conference room table and have it display on the wall, without having to set it up on books or anything like that. This is what we call a good thing. It allows for the arrangement in figure one; with the projectors sideways, the projection beams allow the viewer to stand about as close as most people ever want to. In general, it gives you two possible locations for a projector to project onto a particular screen. Without this advantage, we never could have made the BNAVE as large as it is, given the space constraints.
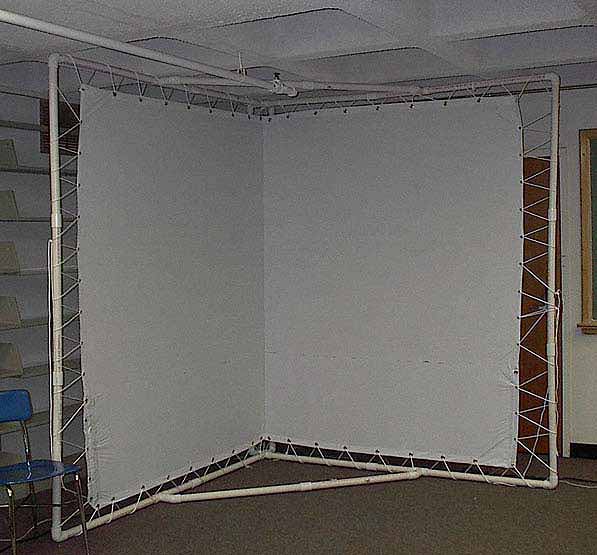
The minimal UT-Cave (fig 13) showed at CHI 2002 (fig ??) and will show at Ultra Unreal and the HFES 46th meeting. It uses tripod-mounted projectors to project onto screens stretched from a collapsible frame made from PVC pipe. (fig 14 & 15 ) As you can see, the basic configuration is much as same as in figure one.
You can add more screens to this arrangement, up to a total of thirty-one screens. They can be front or rear projected, or it can have some of each. The only requirement is that a user in the ideal viewing location should not be in the way of any projectors. The physical design of a more-that-two-screen display is left as an exercise for the reader.
Two 70"x88" sheets of "FS 12oz White H/G with grommeted at 1-foot intervals on all sides. From Royal Banner Inc. 1-800-545-7818
For the first prototype, I used white shower curtains and added grommets to the edges myself. It worked reasonably well, but the banner material is much better. This particular material consists of three layers. One black layer in the middle and two white layers on the outsides. The internal black layer prevents any light from getting though, which can be important in an environment with a lot of ambient light. In a front-projection setup, any backlight will degrade your image.
The very best thing is to order a professional screen material from Screenworks at 1-312-243-8265. Ask for David Hull and tell him I sent you. ;-) My advisor bought two rear- projection screens, also grommeted, from them for approx $500. The screens fold up nicely and do not crease like the banner material does; it is intended for travel. I have no doubt they have an equivalent front-projection material.
To make a long story short, the better your projection surface is, the more of the projector's light it will reflect. But the brighter your projectors, and the darker the room, the more you can get away with. My wild guess is that the banner material reflects about 80% as much light as a professional screen and the shower curtains reflect about 60%. So the 1000-lumen-bulb projectors looked like 800-lumen projectors when shining on the banner material. In a dim room, it made little difference. The shower curtain, by the way, let enough light through to be used as a rear-projection material. If your projectors are bright enough, you can get away with it, but I advise you look at some other materials, first.
Also, the brighter your projector is, the more it will wash out imperfections on the screen. Dirt, scratches and creases are never desirable, but they usually get washed out in the brighter image. Finally, you should be aware that any projection surface, except a professional screen material could change the overall color(s) of the scene you project onto it. However, you may be able to compensate by changing the color balance in the projectors, themselves. Just be sure to set them back when you are done.
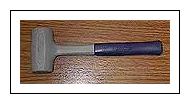
(fig 16) The screen frame is made of PVC pipes and the plastic hammer is for pounding it together and apart. Avoid the black hard-rubber mallets. They smell bad, leave black marks on the pipes and tend to get chewed up.
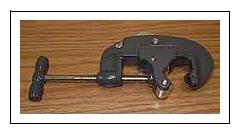
(fig 17) Use this to cut the PVC pipes to make the screen frame. You could use any fine-toothed saw, but the pipe cutter is much faster, easier, and gives a smooth even cut every time.
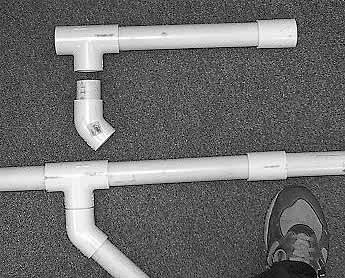
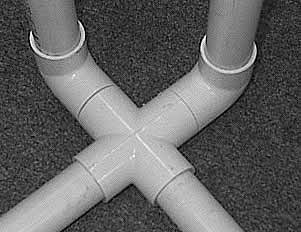
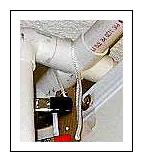
Obviously, there are all sorts of materials you could use to build your frame. I chose PVC pipe, because it's cheap, not-too-heavy, easy to work with and rugged. The general configuration is obvious, from figure fifteen. Figure eighteen is a close-up of the lower part of the central corner, figure nineteen shows how those two diagonal cross pieces attach to the frame The cross pieces are only needed to increase the strength and stability of the frame. Figure nineteen also shows how the very short pieces of PVC pipe fit the joiners together into larger configurations.
Counting some extra, 90' feet of 1-1/4 inch PVC pipe material. Cut into:
You will also need:
Fear not! When you first assemble your frame, it will be terribly unstable, wobbling drunkenly at the merest push. Once the screen material is on and stretched, the whole thing will become much more stable.
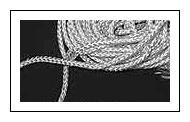
For this, you want the slippery or slick kind. This is important for tensioning the screen material onto the frame. (see fig ??) With this rope, you can tighten it in one spot, and extra tension you introduce will partially spread to the nearby grommets on the screen material. This greatly reduces the amount of fine-tuning you have to do.

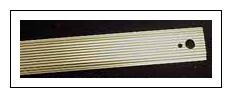 A "carpet seam binder" is a strip of metal (fig
21) which is sometimes used in the United States to cover a seam between two carpets, especially if they are of different types or
there is a gap between them. I used it to clamp the edges of the two screens together at the corner where they join. (fig 22) It
is very important that this corner be even and smooth. For rear-projection, the joining mechanism has to be very thin where it
touches the screens, otherwise it would get in the way of the projections. The carpet seam binders are perfect for the job. As
explained below, I used four pieces that are 31" long and two 28" pieces for the middle. Note that the end pieces each have a hole
at the one end, as shown in figures twenty-one and twenty-two to thread the rope through. You can cut the seam binders with a
hacksaw because they are made of aluminum, and you smooth the edges with fine grained sandpaper. Be sure to use the sandpaper to
round off the corners of the seam binder strips a bit, so they don't scratch things and/or puncture the screen material.
A "carpet seam binder" is a strip of metal (fig
21) which is sometimes used in the United States to cover a seam between two carpets, especially if they are of different types or
there is a gap between them. I used it to clamp the edges of the two screens together at the corner where they join. (fig 22) It
is very important that this corner be even and smooth. For rear-projection, the joining mechanism has to be very thin where it
touches the screens, otherwise it would get in the way of the projections. The carpet seam binders are perfect for the job. As
explained below, I used four pieces that are 31" long and two 28" pieces for the middle. Note that the end pieces each have a hole
at the one end, as shown in figures twenty-one and twenty-two to thread the rope through. You can cut the seam binders with a
hacksaw because they are made of aluminum, and you smooth the edges with fine grained sandpaper. Be sure to use the sandpaper to
round off the corners of the seam binder strips a bit, so they don't scratch things and/or puncture the screen material.
For grinding off the sharp corners of the carpet seam binders.
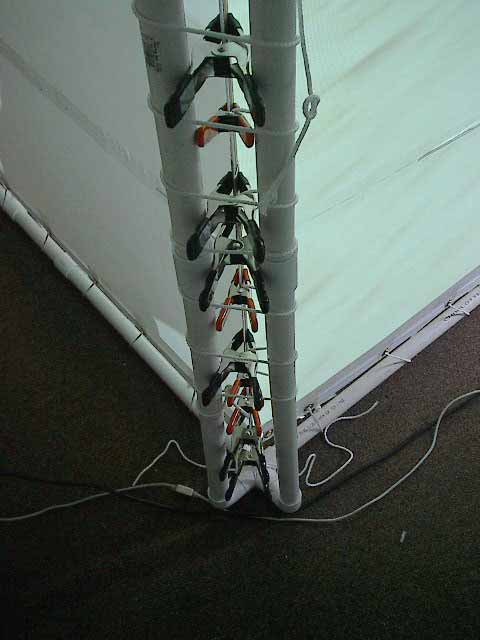
See figure twenty-two. The 2" clamps are the black ones. I used 10 of those and 10 of the one-inch clamps, but it's probably easier to just use only 2" clamps. As you can see in both figures, they clamp those carpet seam binders to the screens, effectively creating a strong seam. The clamps also serve like grommets in that you thread the nylon cord through them as shown in figure twenty-three. You can pull the cord rather tight, but be careful. If you tighten it too hard, the clamps will start to slip off of the carpet seam binders
1 On a clean floor or a large clean surface, lay one of the screens face-up.
2 Lay the other screen on top of it, face-down. The grommets won't line up, but that's doesn't matter.
3 Your "stack" of two screens is rectangular, of course. Choose one of the long sides of this stack, and lay three of the carpet seam binders on top of the screens, parallel to that edge and about 1" to 1 1/4" from the edge. Arrange the other three in exactly the same way, but upside down, underneath the screens, along the same edge. The two rows of seam binders should be facing each other. One by one, put the metal clamps into place, so the seam looks like the one in figure twenty-three. While you do this, make sure that the edge of the two screens is pulled taught. There will be creases and wrinkles, at this point, in the screen material, and you don't want any of them between the seam binders. Also, you need to make sure that the carpet seam binders are exactly the same distance from the outer edge of the screen at all points. In other words, they need to always be exactly 1" from the edge all along the length of the seam. The distance can be 1 1/4" or even 1 1/2". It doesn't matter, as long as it is consistent. Be careful that the bottom pieces perfectly line up with the ones on top. It is best for three people to do this job, though one person can do it. Finally, don't worry too much. ;-) If you do this incorrectly, there is a way to fix it later.
4 With the clamps and the carpet seam binders, you now have a seam joining the two screens. Decide which end of the seam is going to be the top, and then put a two-foot piece of cord halfway through the two holes of the carpet seam binders. (fig 24)
5 CAREFULLY, move the screens to the frame. One person can do it, but two is much better. Bring the top end up to the top corner of the frame. Tie the piece of cord around the 4-way cross piece joiner at the top of the frame. Be sure to wrap the cord through opposite corners of the cross piece, as shown in figure twenty-four. This will allow the seam to hang directly underneath the center of the cross piece.
6 Tie the bottom of the seam to the bottom cross piece in exactly the same way. Make it tight, but not too tight, or the clamps may start to slip off the carpet seam binders.
7 Take a 20-foot length of the nylon cord, tie one end to the frame (fig 25) and start looping along the top of one of the screens as shown. Work from the first available grommet near the inner corner of the frame towards the outside. don't pull too hard. Keep the top edge of the screen some consistent distance from the top PVC pipe. At the same time, make sure that the bottom edge is at least and inch or two above the bottom edge of the frame.
8 Keep threading the cord until you reach the top corner of the frame and keep on going down the outer edge. (fig 26) I have not figured out how to rope the outer corners in a good way, which is why the screen there sags. I am open to suggestions! Anyway, continue threading until you reach the middle of the outer edge, and stop there. Don't pull it tight, just yet.
9 Thread the other screen, at the top, in exactly the same way.
10 Thread the bottoms of the both screens in exactly the same way you did the top edges. The loose ends of the ropes for top and bottom should meet in about the middle of the outer edges.
11 Thread one long piece of cord through the hand clamps behind the cental corner of the frame, as shown in figure twenty-three start at the top and work your way to the bottom. Don't pull the cord too tight, yet, but don't let it hang in loops. Attach it at the top and bottom by wrapping it around one spur of each crosspiece a few times, but don't tie it off.
12 Gently, but firmly, tension the top or bottom edge of one screen, whichever one has the most room between the edge of the screen and the frame. Start at the first loop of the rope, which goes though the first grommet nearest to the frame's central corner. Pull the slack out of that loop and get rid of the slack by pulling on the next loop. Then pull the following loop and so on. Keep going past the outer corner of the screen and go down (or up) along the outer edge of screen. Eventually, you will reach the place where the end of cord is and all the slack will just become more rope hanging off the end. Secure it by tying a slip-knot or just wrapping it around the PVC pipe a few times.
13 Tension the other side of the screen, the top or bottom, and work out to the outer edge, in the same way described in step 12.
14 Tension the other screen in exactly the same way.
15 At this point, you need to take a serious look at the inner corner of the screens. It should bow inward, toward the viewer a bit, which will be fixed in the next stop. Don't worry about that. Is it clean and consistent? Are there any puckers or wrinkles caught in it? If it is flawed, then you can fix it: Take all the clamps and the carpet seam binders off of the back of the seam, but let the carpet seam binders stay tied to the screen frame. Remove the cord that you had strung through the clamps. Now, rebuild the seam in much the way you did it in step 4, starting from the top and work down. You will find it is actually easier, this time, and you should get a good, straight edge. I have never dared to put the screens up, first and make the seam later. I think the screens would be too far out of place to make a good seam possible if you don't make the seam before hanging the screens. If you try it, please let me know how it turns out. ;-)
16 Move along the edges of the screens tightening the loops of rope, as much as necessary to make the screen hang flat and to make the main corner clean and straight. You will find that you have to pull a bit more near the center of each side of each screen. This phenomenon will be familiar to anyone who stretched a canvas over the traditional wooden frame to make a painting. The PVC pipes in the frame will bow in a bit. It's normal.
Now, you are done with the screens! If you are careful, you can slide the whole assembly to another spot on the floor. I like to assemble the screens in the middle of the room, then slide it into the corner where it will be used.
While I was on-site at CHI 2002 with the VCAVE, I made a temporary "overstructure" for it to shade the screens from the bright lights in the convention hall. (fig 27 & 28 ) Without shade, the projected image would be washed-out by the bright lights in the hall. I used 4'x8'x1" sheets of pink construction foam, called "Foamular" by Down Corning, it's manufacturer. (What is the generic term for this stuff?) I bought the sheets from a large hardware and construction supplies store, and it is *great* for all sorts of construction! It's light, strong, cheap, stable, you can cut it with a steak knife, tape it with packing tape, and glue it with standard wood glue.
The "roof" of this structure is a right triangle (11.31' x 11.31' x 16') made from three sheets of foamular. It looks like I used four sheets, but the two corner pieces are both taken from one sheet. I glued the edges together and also taped them with clear packing tape--in this case the cheap 3M Mailing tape. Once the pieces are taped together, they are remarkably stable. I was able to maneuver and cut the them as a single pieces, immediately after putting the tape on. The glue was there for added stability-- tape will usually slowly peel off if it is subjected to the right stresses, but not before the glue has dried and formed a strong bond. Once the glue dries, it forms quite a strong bond.
WARNING! The pink insulation foam is flammable! If something sets it on fire it will burn like a torch! Spraying it with some kind of fire retardant would be a good idea. At least be careful. I didn't know this until someone at the conference told me....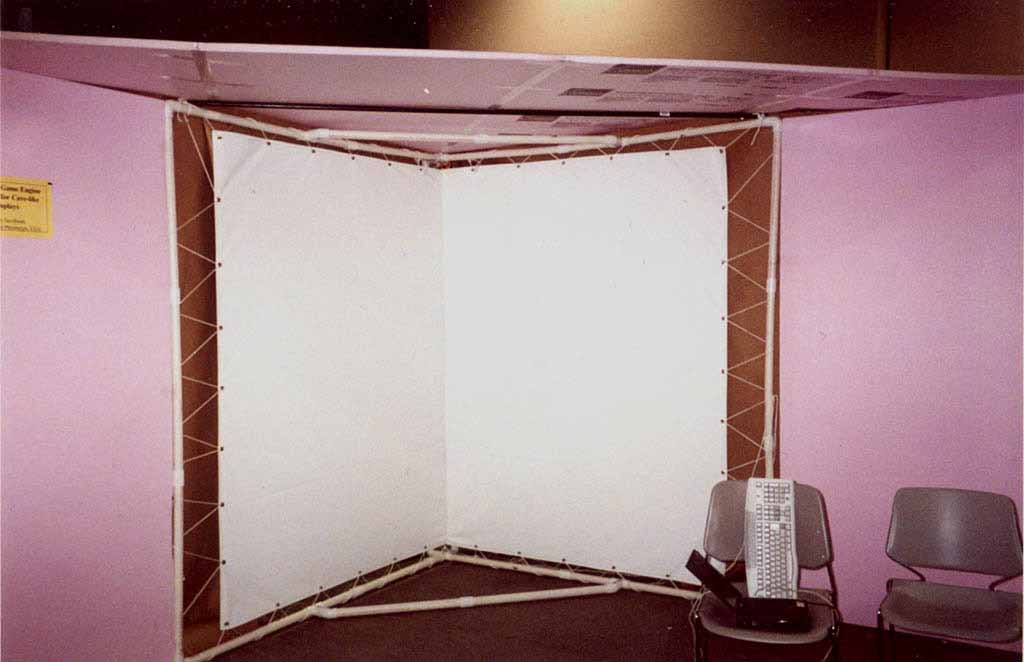
As you can see in figure twenty-eight, simple brown construction paper blocks light from coming through the lacings between the frame and the screens. I would have used it behind the screens, too, but this particular screen material is already opaque. If your screen material is at all transparent, and you are using front-projection, you must put something behind the screens to prevent light from leaking through the screens. It will tend to wash out the projection image.
Finally, there is single black bar supporting the frame's roof, which you can (barely!) see in figure twenty-eight. It's just a water-pipe I laid on top of the PVC pipe structure and tied onto the frame with two bits of rope. The whole thing went into the trash when CHI 2002 was done.

Figure twenty-nine Shows the entire two-walled UT-Cave, computers projectors, screens and all, packed into its travel bags. I was able to take it with me as my standard airline luggage, with 50lbs and several cubic feet of extra capacity in the bags for personal stuff. Everything fit into the standard dimensions of check-through and carry-on luggage for airline flights in the continental United States, without incurring an extra fee for oversize or overweight luggage. Roughly, the four pieces are:
Everything for the portable screens; the screen materials, the PVC pipes, the joiners, the clamps, the carpet seam binders, and the rope. Altogether it weighted about 65lbs. At the time I traveled, in April of 2002, all of the airlines had a 70lb weight limit for check-through bags and a 62"-inch rule for bag dimensions. The rule was that the height, width and length of your check- through bag must add up to no more than 62". So, the more nearly cube-shaped your bag is, the more voluminous it can be. It is easy to find standard luggage that fits within these dimensions. I think this policy is fairly stable for airlines in the United States and Canada.
This bag contained the tripods, network hub and cables, power cables and strips, tape, glue, plastic hammer and my personal effects. It ended up weighing 50lbs. Clothes made excellent packing material, especially for the tripods.
WARNING! The large green bag and the black bag, are not designed to handle so much weight. They survived the trip, but are splitting open, and no longer airline worthy. The shoulder straps started to break off after the first day or two, so I had to literally drag them, when I couldn't find a cart or something. Fortunately, the bags each have a plastic bottom piece with wheels on one end.
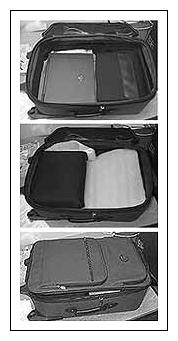
The two projectors and their laptops. Because the laptops are so big, a DELL Latitude and a DELL Inspiron, I had to use case that was just barely within the legal limit for a carry-on bag for United Airlines, at the time. The dimensions are 10"x13"x22" and a 50-lb limit. Unfortunately, the rules for carry-on baggage vary from one airline to the next. For example, US Air has a 40-lb limit and a 10"x16"x24" limit for overhead storage. So, get smaller laptops if you really plan to travel a lot and check the airline web sites for the rules. Our DELLs are excellent, by the way, it's only their great size and weight that makes this tricky.
Figure thirty shows how I packed these together. The arrangement provides only minimal protection to the equipment, so I had to be very careful with it, every step of the way.
DO NOT Try to check the laptops or projectors through baggage, unless you have professional grade packaging for them which is made explicitly for that purpose. If for some reason they had insited I check the green suitcase through luggage, I would have cancelled my flight and found some other way to get the bag, and myself, to the conference.
Usually, the airlines don't weigh the carry-on luggage, although they do reserve the right to do so. It will help your cause, if you are strong enough to act like it isn't heavy when you check in.
Contains the third laptop and some reading materials. Generally, you are allowed to have a purse, laptop, school bag or some other "personal" item with you, in addition to your carry-on bag. However, US Air (at least) may complain if your laptop case is too large. Some laptop bags are huge and are made to carry lots of stuff.
Moving the luggage around WAS difficult, mainly because of the big bags' awkward shape or lack of shape. For a basis of comparison, I weighed 165lbs at the time, at 5'10" tall. I did do some weight lifting in the past, but I'm NO kind of athlete. For example, I had no problem lifting the green suitcase over my head to get it into the luggage rack, but taking it all around the airport was a workout. It has the little wheels on the bottom, and a telescoping handle, which probably saved my life. But the handle was about 2" too short, forcing me to lean over to one side to pull it. I solved the problem by putting the laptop on top of the wheel-bag and looping the laptop's strap through the extended suitcase handle.
The pink insulation foam comes in very thick sheets. Instead of finding a blank room corner, you could simply use two large 2"-thick sheets and tape/glue them together at a 90-degree angle. Before or after joining them, you'd have to affix some white projection surface onto the inside. If you have the time, paint is probably the easiest thing to use.
If you want the UT-Cave to have a stereographic image, there are several ways to go about it. To make a long story short, you have to either use stereographic projectors or twice as many monoscopic projectors. Your projection surface has to be reflective in a certain way for the image to remain stereoscopic, if you are using two projectors or passive stereo. Silver screen works well, or a wall painted with a metal based paint. If you are using shutter-glass technology, this is not a problem.
I have a lot of information on this, but I'm ready to write it all down, yet. If you are interested, please ask.
My great thanks to Dr. Lewis at the School of Information Sciences at University of Pittsburgh for buying all of the equipment for the portable UT-Cave, sending me to these conferences and all his moral support for the UT-Cave's development. Thanks also to everyone else in the department who helps in other ways and generally tolerated my creative process.
If you have comments about CaveUT in general or this website in particular, please contact me atJeffrey Jacobson.